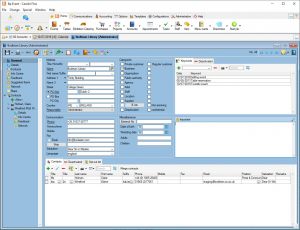
Create a new account
- Go to
 Home >
 Accounts >
  New.
New. - In the Name field, enter a company or family name respectively and
 check for duplicates.
 - Other mandatory fields, such as email, phone number or city, are site-specific and usually underlined.
- Select at least one account category.
Create a new contact
(Standard version)
- Stay on the Account >
 General tab.
 - In the bottom part of the window, click on
 Contacts >
  New to add an unlimited number of contact persons with their individual contact details.
 - Flag the primary contact by ticking the box in the first column.
(CRM plus module)
- In the left-hand navigation pane, go to
 Contacts >
  New.
New. - Enter a home address, keywords or remarks.
- Flag the primary contact and bulk mail recipients (for newsletters etc.) by ticking the appropriate box.
Document the origin of personal data (data collection)
- In the left-hand navigation pane of the account or contact, go to
 Data use > Data collection >
  New.
New. - Select a processing purpose and legal basis for the collection of personal data.
- Document the data source and, if you have relevant communication, link the email to your entry. Alternatively, scan and save a printed letter as an image.
- Enter a start date for the deletion period.
Document the consent for future use of personal data (data processing)
- In the left-hand navigation pane of the account or contact, go to
 Data use > Data processing for advertising purposes >
  New.
New. - Select how consent for future data use was given and, if you have relevant communication, link the email to your entry. Alternatively, scan and save a printed letter as an image.
- Mark advertising purposes and contact media for which you have either explicit consent ("Yes") or refusal ("No") .
- Leave unmarked such purposes and media for which you have no explicit instructions.
- Declarations of consent cannot be changed, but need to be replaced by a new declaration.
Enter additional information for an account
- Add user-defined and dated
 Keywords under
  General.
 - Under
 Details, add standard addresses for invoices and deliveries to this account.
 - Also under
 Details, enter suggestions and information for events, table reservations or invoices that will pop up whenever a new boooking is made for this account.
 - Ent item suggestions such as preferred beverages for regular customers under
 Suggested Items.
Create contact notes*
- In the left-hand navigation pane, go to
 Customer contacts >
  New.
New. - Fill in the mandatory fields such as subject, category and processing purpose.
- Enter details under Description.
- Create a Follow-up in the right-hand corner of the entry window. The follow-up will show in bottom part of the general
 Info Centre on the selected date, inasfar as
  Contact notes are selected as data sources.
Create new records linked to the account
- The more usual types of records (Events, Appointments*, Mails etc.) can be created by clicking
 New in the horizontal toolbar of the account. The new records created in this way are already linked to the account and prefilled with all relevant data.
 - Additional types of records can be found under the account's
 Info Centre, insofar as they have been selected as
  Data sources.
Find records linked to an account
- In the horizontal toolbar of the account, click on

 to open a list of all linked events and bookings.
 - Click on
 for a list of all items that have been booked to the account.
 - For other records such as mails or emails, go to
 Info Center. Select the desired
  Data source and filter by status, name or responsible as required.
Remove accounts or contacts from the standard search
- In the left-hand navigation pane, go to
 General.
 - Deactivate accounts or contacts which are no longer needed. Deactivate an account by selecting "Deactivated" as account category or mark and
 remove individual contacts from the list.
 - Restrict access to the record owner by select the account category "confidential".
- Mark accounts or contacts that have requested to exercise their right to erasure pursuant to Art. 17 GDPR as
 Opt-out. Erase the entire account by clicking
  in the horizontal toolbar, or individual contacts by selecting the name and clicking
  above the list of contacts.
* CRM plus, Appointments
Screenshots


