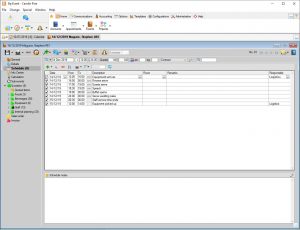
Create a new event schedule*
- In the left-hand event navigation , click on
 Schedule.
 - Left-click
 New above the entry window to create a new schedule entry.
 - For one-day events, the date defaults to the event date.
- For multi-day events, new entries are pre-filled with a "daily" value. Enter a date manually or select one from the list to apply the entry to only one date.
- Schedule items can only be created for the day(s) of the event plus/minus one day for set-up and teardown.
- By default, new entries are checked in the first column and set to appear on customer print-outs.
- If the entry is for internal use only, uncheck the line. The schedule item will then print only on internal prints.
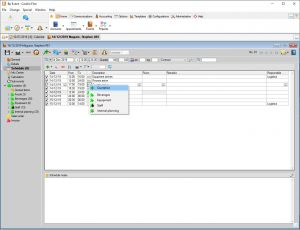
Enter schedule details
- Enter From and To times.
- Under Description, select a name for the entry from the drop-down list or enter a custom name.
- Enter the number of Guests if different from the main event.
- Under Room, select a room from the drop-down list of rooms booked for the event. Custom entries are not possible.
- Add additional Remarks if needed.
- Multiple lines can be changed simultaneously. Select the cells you would like to change (start time, description) by left-clicking with the Ctrl key pressed down. Right-click to open the context menu. Either enter a new value, or, for times, opt to shift the times back or forward by a specified period. Confirm by clicking OK.
 Save the event and event schedule.
Use an event schedule template*
- In the left-hand event navigation, click on Schedule.
- Left-click

 >
>  New from template to open a selection of available events with event schedules.
 - Either select the
 Complete Schedule or one of the entries listed below.
 - To remove individual entries later, select the lines and click
 delete in the horizontal toolbar.
Link a schedule entry to an existing booking*2
- In the schedule list, right-click on
 link to reference an existing
  Quotation or eine
  Sales order. The icon will change to Quotation or Sales order respectively.
 - Changes effected in the schedule will be shown in the booking and vice versa.
- Left-click to open an inspector window with essential booking info (name and details).
- Right-click to open the booking or break the link. Both schedule entry and booking will remain unchanged if the link is removed.
Create a new booking linked to a schedule entry
- In the schedule list, right-click on link to reference an New Quotation or New sales order.
Please note: As soon as any sales orders have been created, no new quotations can be created here. - The booking Name defaults to the descriotion of the schedule entry but can be changed manually.
- Click OK to open the new booking and add sales items.
- Bookings can only be created and linked only for the date(s) of the event, not the set-up or teardown dates.
- Changes effected in the schedule will be shown in the booking and vice versa.
- Save the new booking.
Reject a booking linked to a schedule item
- In the left-hand event navigation, click on Booking > General.
- At the upper edge of the window, change the Booking status from In progress to Rejected and confirm.
- To delete the schedule item as well, answer the prompt with Delete schedule item.
- To retain the schedule item and remove the link, opt to Break link.
- Save the event.
* Event schedule module
*2 Multi-bookings module
Screenshots